Showing posts with label scrapmuse. Show all posts

Wednesday, April 14, 2010

March Mega Muse


sorry for the delay....LOVED this kit!
Photobucket

Monday, March 1, 2010

MegaMuse sneaky peak


It’s March 1st and that means everyone gets a look at the March Kit! These colors are perfect for all of us who are anxiously awaiting spring. If you’re a member of ScrapMuse, you will automatically receive this beautiful kit titled “Spring Has Sprung!”. Otherwise, head over to the ScrapMuse Store where you can purchase one. All kits ship on the 15th of the month.
This kit contains NEW paper from Scribble Scrabble and My Minds Eye, not to mention all the embellishments that Missy packs into a kit. The full list of contents is below.


Kit Contains the following:
Paper:
Scribble Scrabble – Nanas Trunk – No. 351
Scribble Scrabble – Nanas Trunk – No. 352
Scribble Scrabble – Nanas Trunk – No. 353
Scribble Scrabble – Nanas Trunk – No. 354
Scribble Scrabble – Nanas Trunk – No. 355
Scribble Scrabble – Nanas Trunk – No. 356
MME- Jack and Jill – Favor ite Thing Colorful Umbrella
MME – Jack and Jill – Favorite Thing Bright Argyle
MME – Jack and Jill – Sweet Thing Yummy Stripe
MME – Jack and Jill – Life is Good Serene Spots
MME – Jack and Jill – Cute Beautiful Blooms
MME – Life Stories – Frequency Grid
Embellishments:
MME – Jack and Jill – Cute Title
MME – Jack and Jill – Cute Alphabet
MME – Jack and Jill – How Sweet it is Journaling Card
MME – Life Stories – Accessory Sheet #1
Endofthedaycrafting(Etsy) – Baker’s Twine Blue (2 feet)
Endofthedaycrafting(Etsy) – Baker’s Twine Red (2 feet)
Basic Grey – Nook and Pantry – Buttons (assorted)
Prima Marking – Daisy Dreams – Lagoon (1/2 package)
May Arts – Velvet Cordoroy – Aqua (1 yard)
October Afternoon – Mini Market Alphabet Stickers – Very Merry Teal and Black
ScrapMuse – Kraft Tags (4)
JujaCrafts(Etsy) – Organza Flowers (2)
Candy Bar

Photobucket

Sunday, February 14, 2010

ScrapMuse Spread the Love Blog Hop!


Welcome to the "Spread The Love" blog hop for ScrapMuse

If you have just happened upon my blog, you'll want to start at the beginning of our blog hop..Take the time to leave some love on each design team members blog post for the blog and once you have visited (and commented on) all blogs, leave a comment on the ScrapMuse blog to let us know about it.

Here is our blog rotation for this evening

2. Ruth
5. Teresa ...that's me :) you are already here!
10. Chiqui
12. Kristy

ScrapMuse is a mid-month kit club which will soon be celebrating their 6th year of offering kits that feature all the latest and greatest scrapbooking companies such as Basic Grey, Pink Paislee, Prima Marketing, Fancy Pants Designs, Jillibean Soup and so much more! ScrapMuse publishes a monthly newsletter featuring great technique articles, inspiring layouts and fun tips. At the ScrapMuse website you will find an active, friendly message board and gallery.

For information about ScrapMuse’s monthly schedule, including kit reveal, shipping, payment dates, and to sign up for the monthly ScrapMuse kit, please visit the Join Us page or email melissa@scrapmuse.com. Three and Six month prepaid subscriptions are available now in the store. All memberships and subscriptions will begin with the March 2010 kit.

I wanted to post a couple of quick cards that I haven't show on here yet. This first one is made from the December Specially kit "family ties". For the whole month of February all past kits and add-ons are 25% off. Just use the code KITS25 to receive the discount.
be sure to check out the Family Ties kit


This next card is made with scraps from several of my past SM kits..... I love to mix and match my extras, and since Melissa puts together HUGE kits I still have usable amounts left from every kit I have received!

Time hop on over to Holly and check out her great blog!


Photobucket

Tuesday, February 2, 2010

Spread the Love, scrapmuse


When you think of February you think of LOVE! At ScrapMuse we are going to dedicate the month of February to spreading the love. "Spread the Love" will be a month long contest held on the ScrapMuse message board. We are going to spend the first 5 days of February getting everything ready for you. You will have the rest of the month to earn points by spreading the love about Scrapmuse, participating in weekly challenges, joining our Blog Hop, and posting on the message board. Since the contest is all about love.....there will also be random "love" points handed out! You will find a complete list of rules and ways to earn points on February 5th in the "Spread the Love" section of the message board. The grand prize for the scrapper with the most "love" at the end of the month will be a Brand New March 2010 Mega Muse and a July 2009 Mega Muse. We will also select a second place winner from a random drawing who will win a March, 2010 Mini Muse.


Photobucket

Saturday, January 30, 2010

contest sneaky peek


If you are one of my scrappy friends and you are not a member of the Scrapmuse forum...... get in there and check it out! Starting February 1st we will be kicking off a month long "Spread the Love" contest! There will be blog hops, weekly challenges, games and PRIZES! We have lots of fun planned, but you gotta be a member :)
Photobucket

Friday, January 15, 2010

Reveal Day!!!


Yay! Today is Reveal day for the ScrapMuse DT!!! This months MegaMuse is full of Webster's Pages and Fancy Pants..... what a fun combination! Everything from soft girlie shabby chic to fun and funky freestyle pages are possible with this kit. And don't forget, Melissa packs these full of awesome embellies! This month we got play with some Tim Holtz' Rock Candy Crackle {I should have my article on this awesome product soon} I still have a big full of embellies to keep creating with. So with out further ado...........


I have really enjoyed working with this months ScrapMuse kit, & I still have lots to work with :) so hopefully there will be some more projects coming from this megamuse!

Photobucket

Tuesday, January 5, 2010

Parisian Nights

Isn't that a great name for a kit???

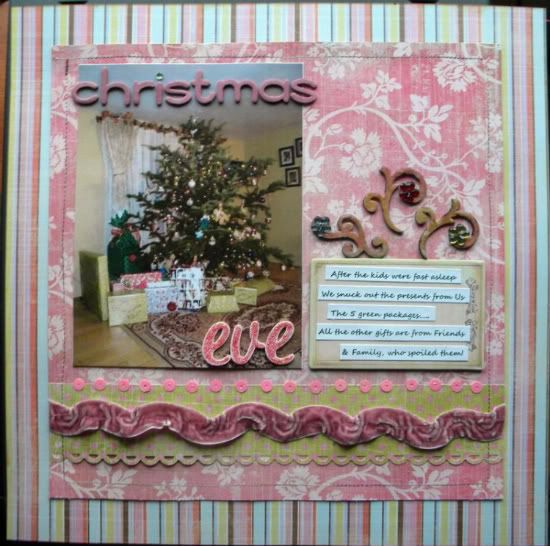
Okay, so this is a first for me... its only the first week of January and I scrapped a Christmas LO :) woohoo! These Fancy Pants papers from this months scrapmuse make a fun non-traditional Christmas page


I'll post some more sneak peeks soon!

Photobucket

Saturday, January 2, 2010

Scrapmuse Sneak Peek


The January Scrapmuse is AMAZING!!! I am having so much fun working with it.... you must get your hands on this kit! I have never seen so many fabulous embellies and papers together in one kit.... trust me, you need one! Oh, and the kit also included a bottle of Tim Holtz "rock candy" clear crackle.... watch for my article on it in this months newsletter. {kits now come with a full color printed version of the monthly newsletter}

Photobucket

Monday, October 26, 2009

ScrapMuse DT call


Calling all Scrappers. ScrapMuse is growing and as a result we have the need to add four additional design team members to our company to design for our two additional kit offerings each month. We are looking for motivated scrappers that can commit to daily participation in both our message board and gallery. We are looking for a variety of Scrapbooking styles.

Design Team Submission Deadline: November 15, 2009

Design Team Duties to Begin: December 1, 2009

Please Send all Submissions and Questions to: melissa@scrapmuse.com


Guidelines for Submissions:

1. ScrapMuse is an exclusive kit club. You may not design for any other kits clubs. Challenge blogs, manufacteurs websites, sketch blogs and magzines are permitted and encouraged.

2. International submissions are welcome. International design team members pay actual shipping cost minus $10.00.

3. Applicants must maintain an active blog.

4. Please submit 4 layouts. Two must be newly created for this call only. Please show us your best work. More than 4 layouts are welcome per entry.

5. Please share a link to your blog and online galleries.

6. Please answer the following questions

Tell us a little bit about yourself. Where are you from? Any kids? Pets? We want to get to know you!

Are you or have you been active on another Design Team, challenge blog, sketch blog, or manufacteur website?

How would you describe your scrapbooking style?

Do you participate in any other scrapbook sites? Please share a link and your username.

How long have you been scrapbooking?

What is your favorite product?

What is your favorite candy bar?


7. Participation in our message board and gallery are encouraged and recommended during this call.

8. Currently we do not have terms for our designers. We only ask that you give us a month notice if you need to leave the team.


Design Team Duties

1. Create 4 layouts or projects each month using only the ScrapMuse kit.

2. Post your layouts to our monthly gallery on the 15th of each month.

3. Participate daily in our message board and gallery.

4. Promote ScrapMuse on your blog and other sites where allowed.

5. Create one step by step instruction for one of your layouts each month.

Designer Compensation

1. One of our new smaller kits each month to use for your designs.

2. Generous Design Team discount on additional kits and add-ons.

3. Featured on our Blog and Design Team page.

4. Additional products and freebies are occasionally sent to our Designers.

Photobucket

Friday, August 21, 2009

~Hollywood~ get a way

Saturday August 22nd, Scrapmuse is hosting a "Summer Get Away" Crop. Challenges are allready being uploaded so you can get started. All day there will be games, make and takes and new challenges added every two hours. I will be running a fastpaced bingo starting @ 3pm eastern (make sure to get your bingo words in early)

Here's a sneak peek at my first challenge


Lets take a trip to Hollywood, walk along the strip, maybe stop by the Hollywood walk of fame and see the stars.
For this challenge you need to create a LO or altered project. I want see photos of people wearing sunglasses (to keep that hollywood sunshine out of their face :cool: ). You will need to incorporate some stars into the project, for the Hollywood stars. and don't for get to add a little bling! Hollywood is full of shining starlets.


Photobucket

August Scrapmuse!


I am so excited about this kit! when I got it in the mail, I dugg in and had everything done in 2days, I just couldn't stop playing with it!

Photobucket

Thursday, July 16, 2009

July MegaMuse

Here's what a created with this the july megamuse {and I still have tons of stuff left to work with}


this months Scrapmuse rocks, better hurry before they are sold out!!!
Photobucket

Wednesday, June 17, 2009

Heat Embossing

Just like many others out there, I have all the tools and supplies needed to heat emboss but don't ever do it. So this month I created a layout, titled "Style", that uses multiple different heat embossing techniques, and I want to share with you all what I did. Hopefully I will inspire you to pull out that dusty heat gun and play with some embossing powder. For anyone that’s not sure if they have the needed supplies, he re are the basics:
• a heat gun
• a stamp pad
• embossing powder
That's it.

For the "not so basic" techniques, I also use:
a glue pad
• an embossing ink pad
• a distress ink pad
• items for masking
• and a soft bristled paint brush

So let’s start with basic heat embossing. In this first close-up of my layout, the Fleur-de-lis is an example of basic heat embossing.

A foam stamp was used to stamp the image onto a scrap of pattern paper from the kit, in a light ink color. While the ink was still wet I sprinkled it with champagne colored embossing powder. Okay, now this next step reminds me of elementary school art class (ahhh, memories)... shake off the extra powder, onto a sheet of scrap paper, and then put it back into the jar. (anyone else having flash backs to white school glue and jars of glitter?) So far, so easy,
right? All you have to do now is heat the powder with the heat gun. Now, be careful as the air that comes out of the heat gun will burn you! If you are using a big piece of paper, you can hold onto the end away from your image. I had a small sheet, so I held the image with my long handled tweezers. Now back to the heating. You want to hold the gun about 2-3 inches from the powder, and slowly move the gun around. You will be able to see the powder melt and spread out into a glossy textured glaze. The embossing will dry very quickly after you finish heating it. To use my image on the layout, I cut it out and layered it behind my flowers. So now that we all know how to do the basic heat embossing, let’s have some fun with it! This next close-up has two different things that I tried with the embossing.
First the distressing on the green paper. I wanted to add some shine and texture to my distressing, so I came up with this technique. I have never seen this done before, but it’s quite possible that others have done this before me. This was so simple, all you need is some distress ink, embossing powder and your heat gun. I swiped the distress ink all over the sheet of paper, and then sprinkled it with pewter embossing powder. Because some of the ink was thinly applied it dried before I added the powder, giving a distressed look to my embossing. Now just follow the basic steps above: shake off extra powder and heat. This random type of distressing would be great for adding detail to boypages, or just grunging up your projects.

The second embossing in this close-up was applied to the title. For this technique you need:
• black ink
• black and sliver embossing powder
• letter stamps
• and your heat gun.

First I stamped my title on a scrap from the kit, spacing the letters out to make it easier to cut them out later. I let the ink dry slightly so that not all of it would hold the powder. Instead of just sprinkling on one color of powder, I added both colors at once, trying to get each letter randomly with both colors. Now when I shook off the extra powder this time, I put it in an empty jar and labeled it, as I had mixed up the colors. This powder is still usable, but you don't want to mix it back in with the original colors. All that's left to do is heat up the powder and cut out the letters.

This next technique was the most fun to do, but also the most time consuming. I created a glittery scalloped border around my layout base.

To create this border you will need:
• 1 sheet of shiny black cardstock from the kit
• large scallop border from the kit
• Rainbow Sparkle embossing powder (made by Ranger, its clear
powder with rainbow glitter)
• a glue pad (this is an ink pad filled with liquid glue, made by
Tsukineko)
• a soft bristled paint brush
• and your heat gun.
This will take a little while, but is worth it and it looks so much cooler in person! You are going to need to work on one side of the base at a time, so the glue doesn't dry out on you. Take the large scallop border and lay it on the edge of the base, as a mask. Dab along the scallop with the glue pad. When the scallop mask is picked up you should have a scallop design along your edge out of glue. Sprinkle the glue with the rainbow embossing powder and then shake off the extra. I used the paint brush to brush off any embossing powder that might stick to your sheet and ruin the clean edge of your scallop. You can glue and powder all 4 edges before heating, just be careful not to mess-up any of the edges while you work around.

Okay, one more simple and quick embossing.

This one is real easy, but adds a great touch to your embellies. I hand cut flowers from a sheet of
patterned paper, and then swiped just the leaves in the glue pad. The leaves were sprinkled with rainbow embossing powder and heated. Just a quick sparkle. This can be done with any embellie. Don't have a brad that matches? Make your own with a little colored embossing powder. Want some more interest in your paper flowers? Stamp on them with a background
stamp and emboss with a metallic embossing powder. I really enjoyed getting some use out of my heat gun, and I hope to see some examples in the gallery soon of what you all have done with heat embossing!

The finished Layout: "Sytle"
thanks for following along

Photobucket


LinkWithin

Related Posts with Thumbnails